


Hit Points
This page will explain Hit Points, which for this tutorial will serve to provide instructions to the user or enable the interactions for getting assistance.
Hit Points are objects created within Xplorer Creator that enable the display of text and images in a scene.
The video for this section is below:
Creating Hit Points
To create a Hit Point, follow the steps below.
- On the Home tab, click the Hit Point button.

- Then, click on a location within the Viewport window to create a Hit Point in the scene.
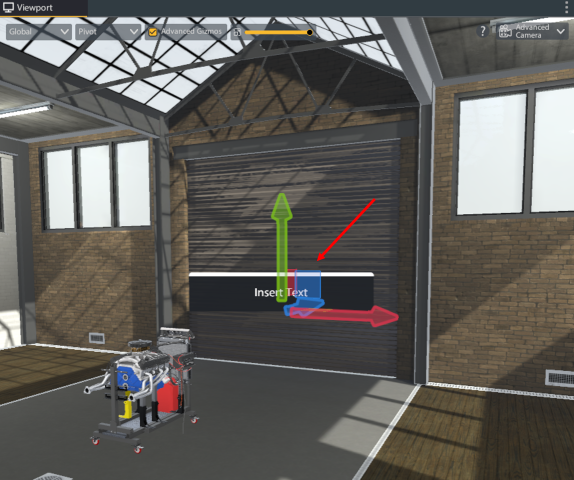
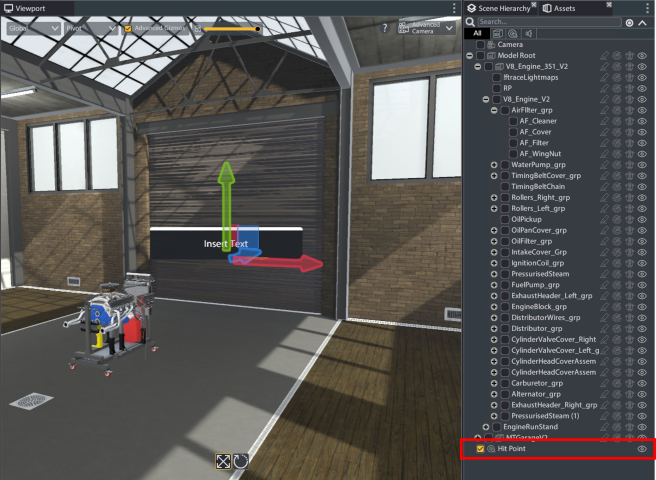
- The Hit Point will also appear in the Scene Hierarchy window.
Hit Point Settings
Hit Points are similar to other objects in Xplorer Creator. They can be transformed and rotated similar to models and also have per-state properties.
However, Hit Points also have unique settings which can affect how they are displayed to users and can be further customized with text and images.
Hit Point Display Settings
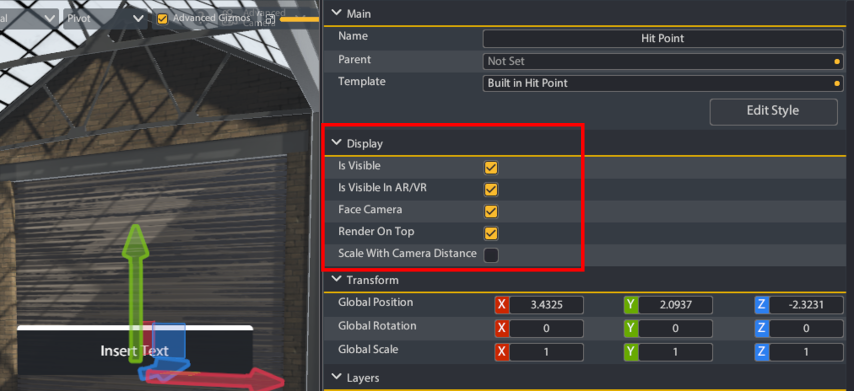
With a Hit Point selected, the Properties window will have the following options in the Display section:
- Is Visible: This toggle will set the Hit Point's visibility, similar to how visibility works with models.
- Is Visible in AR/VR: This toggle sets whether the Hit Point will be visible in AR/VR lessons, if applicable.
- Face Camera: If this option is toggled, the Hit Point will always be rotated to face the user.
- Render On Top: If this option is toggled, the Hit Point will display over other objects, similar to the Highlight effect (see Model Effects).
- Scale With Camera Distance: This option will cause the Hit Point to increase or decrease in scale as the user moves farther or closer to it. If enabled, it will also cause the Scale Factor option to appear.
- Scale Factor: This will cause the Hit Point to increase or decrease in size according to the entered value.
Layers
Hit Points are comprised of layers with editable content that can be toggled on or off. For complex Hit Points, the Layers section has a Search function as well as filters for Text layers and Image layers. The Layers section can also have multiple pages depending on the number of Layers within the Hit Point.
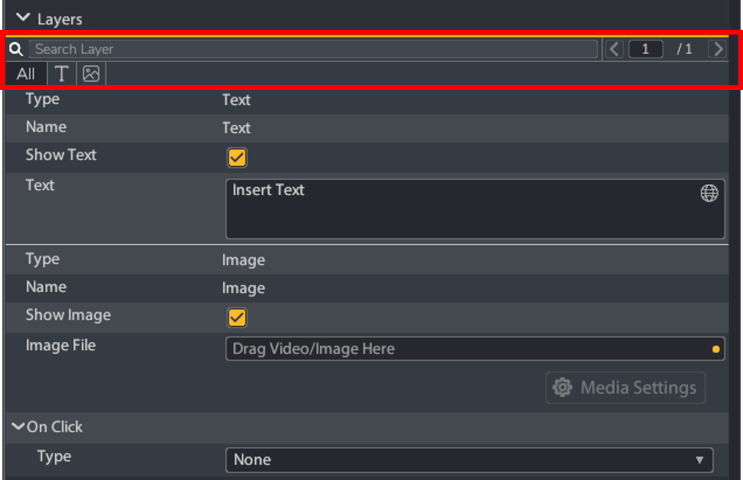
The default Hit Point has a Text and Image layer. The available options are as follows:
Text:
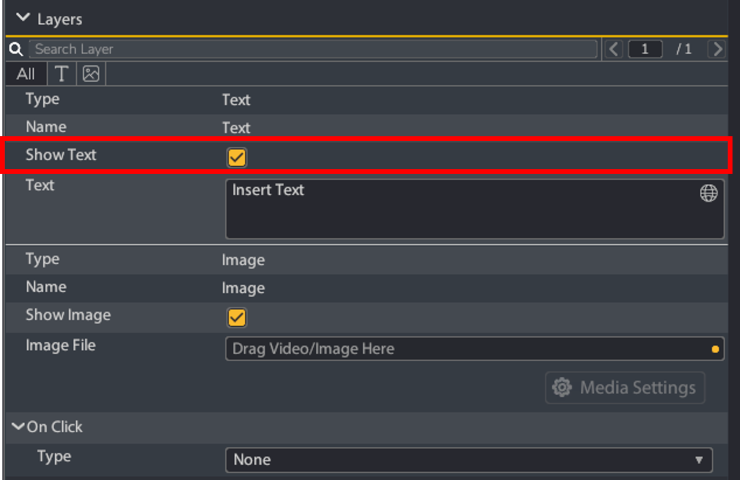
Show Text: If this option is enabled, the corresponding text layer will be visible in the Hit Point.
Text: This box is an editable text box. Any text entered into this box will display in the corresponding text layer of the Hit Point.
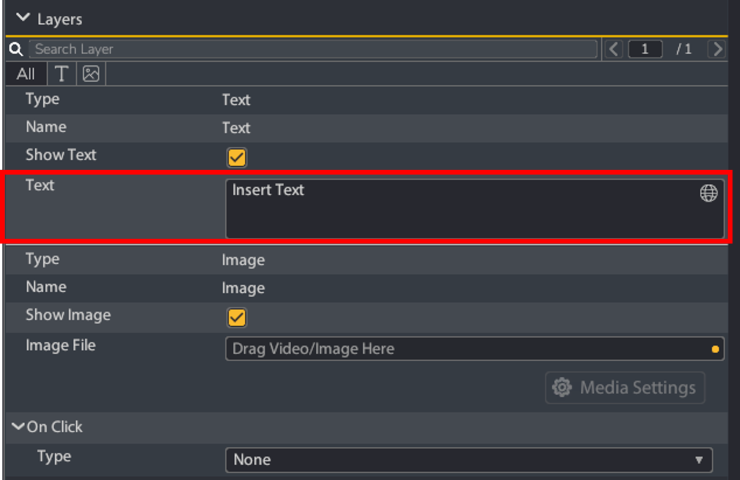
Image:
Show Image: If this option is enabled, the corresponding image layer will be visible in the Hit Point.
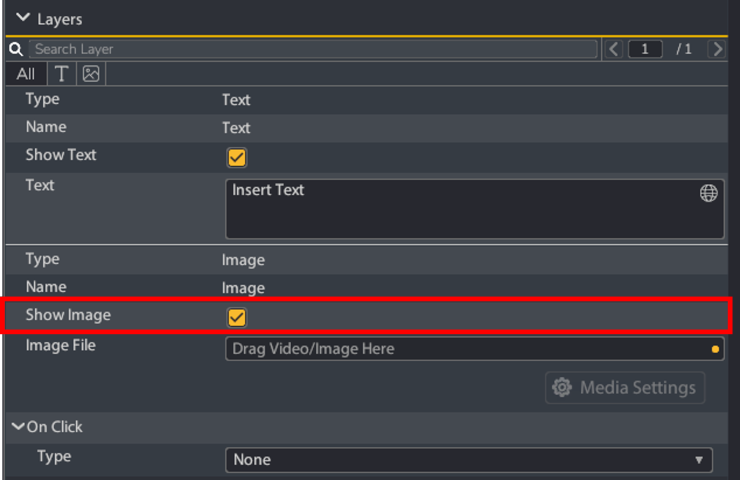
Image File: This is where an image or video file can be attached and will display the context in the corresponding image layer of the Hit Point.
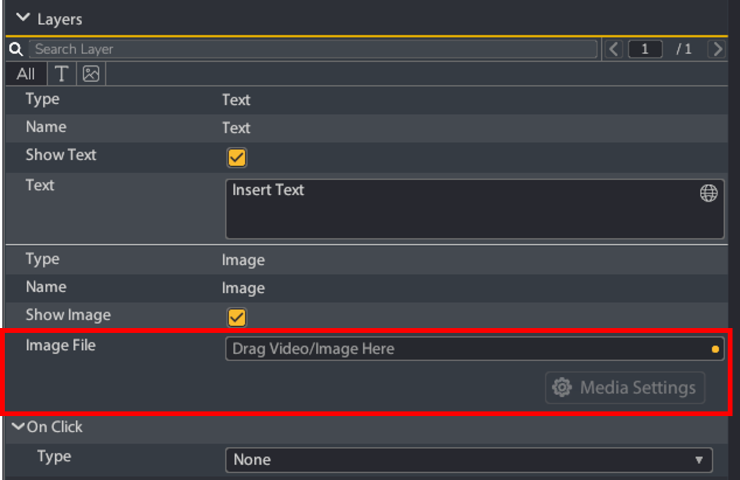
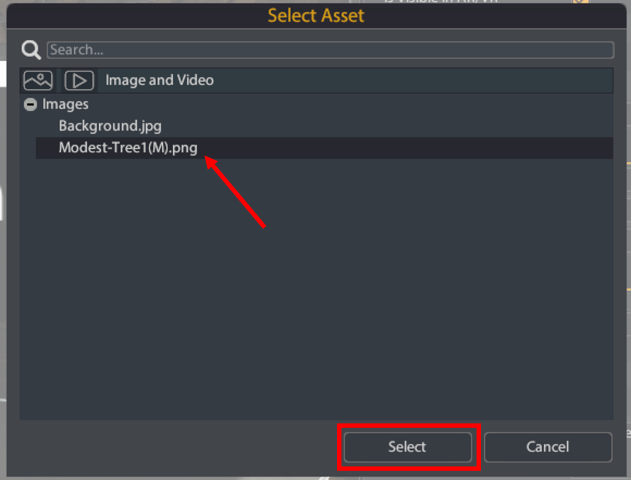
To add a file, click on the box to display the Select Asset window, find the relevant image/video, and click the Select button.
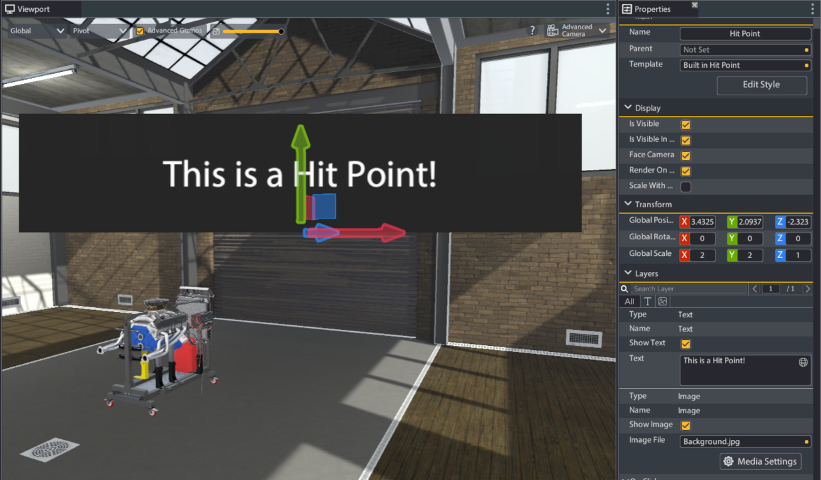
It is also possible to click and drag a file directly from the Assets window.
On Click
Hit Points can be customized with On Click options which can enable interactive elements within a lesson, as done with models in 3-5 Adding Effects and Interactions.
Tutorial: Creating and Positioning Hit Points for Air Filter Replacement Lesson
For our lesson, we will be adding two Hit Points. The first will be positioned in front of the White Board model, which will be used to provide an introduce and concluding message for the user. The second will provide instructions to the user and be used for interactions (such as requesting assistance and moving to the 'Highlight' states). As a result, this second Hit Point will also be parented to the user's camera.
We will do the following:
- Select the Edit Master State button.
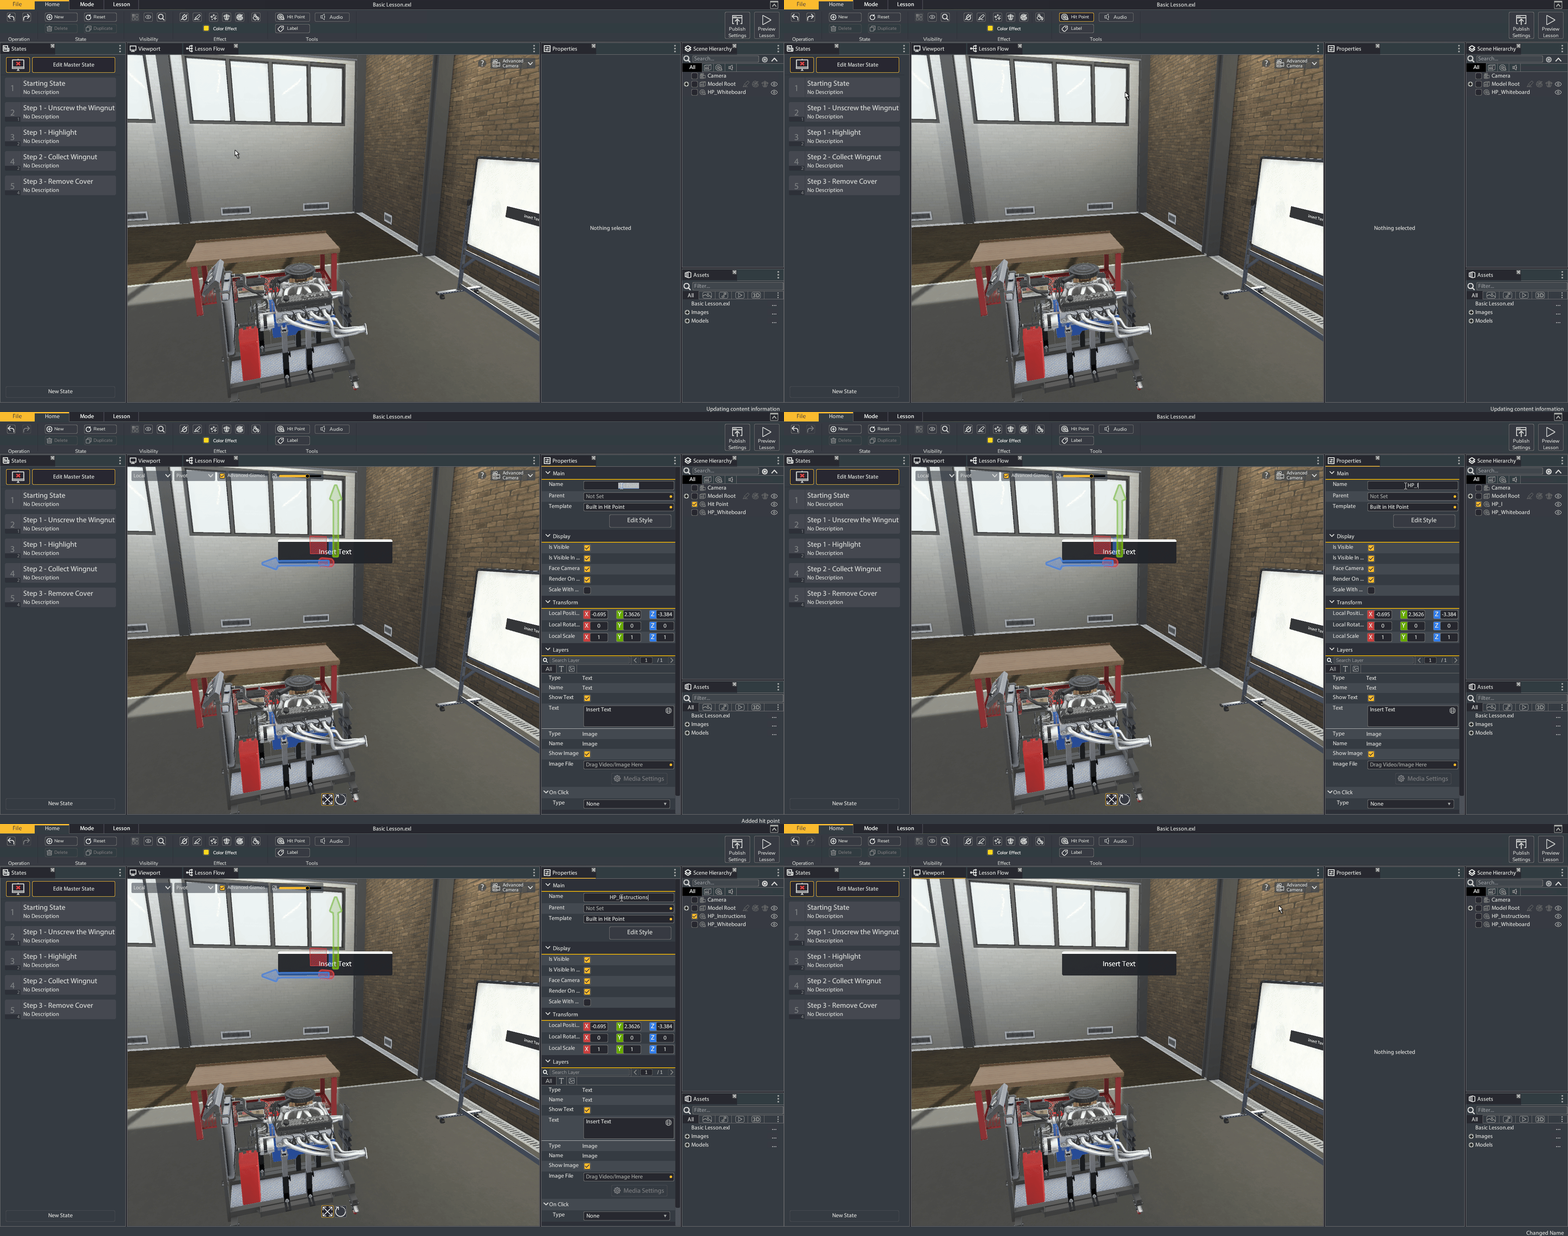
- Create a Hit Point and name it 'HP_Whiteboard'.
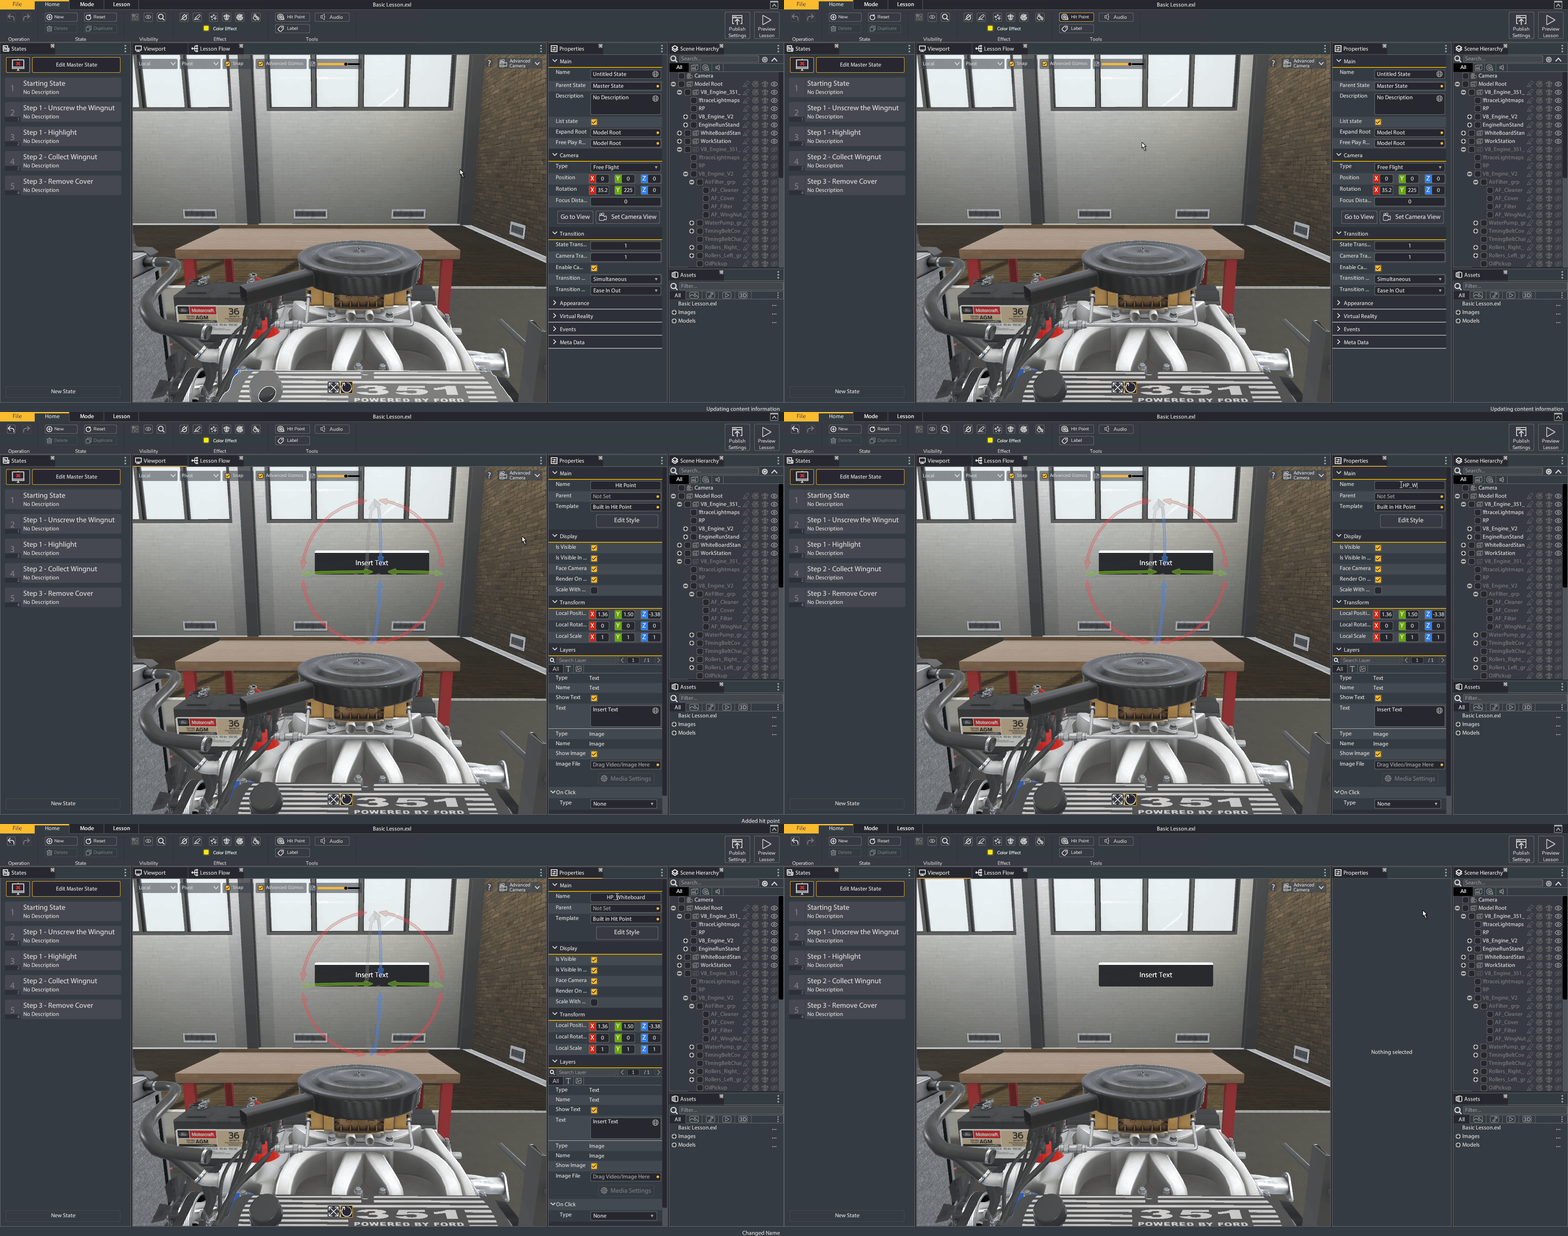
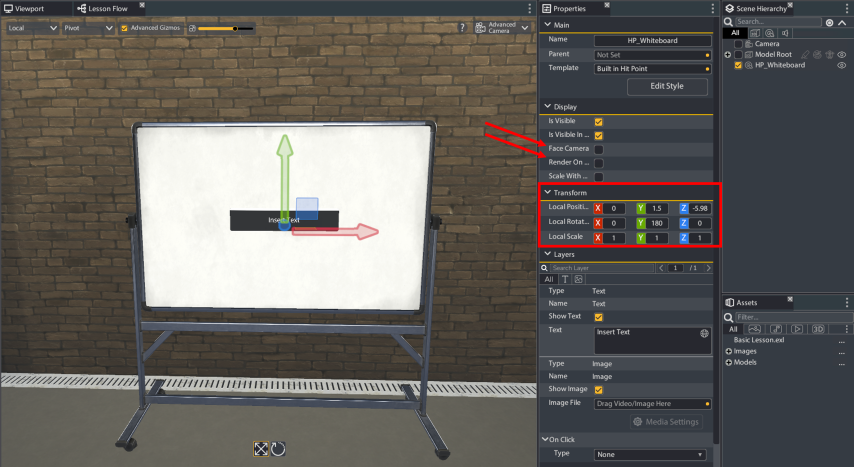
- Position 'HP_Whiteboard' over the Whiteboard model. Make sure to disable the Face Camera and Render On Top options.
- Create a Hit Point and name it 'HP_Instructions'.
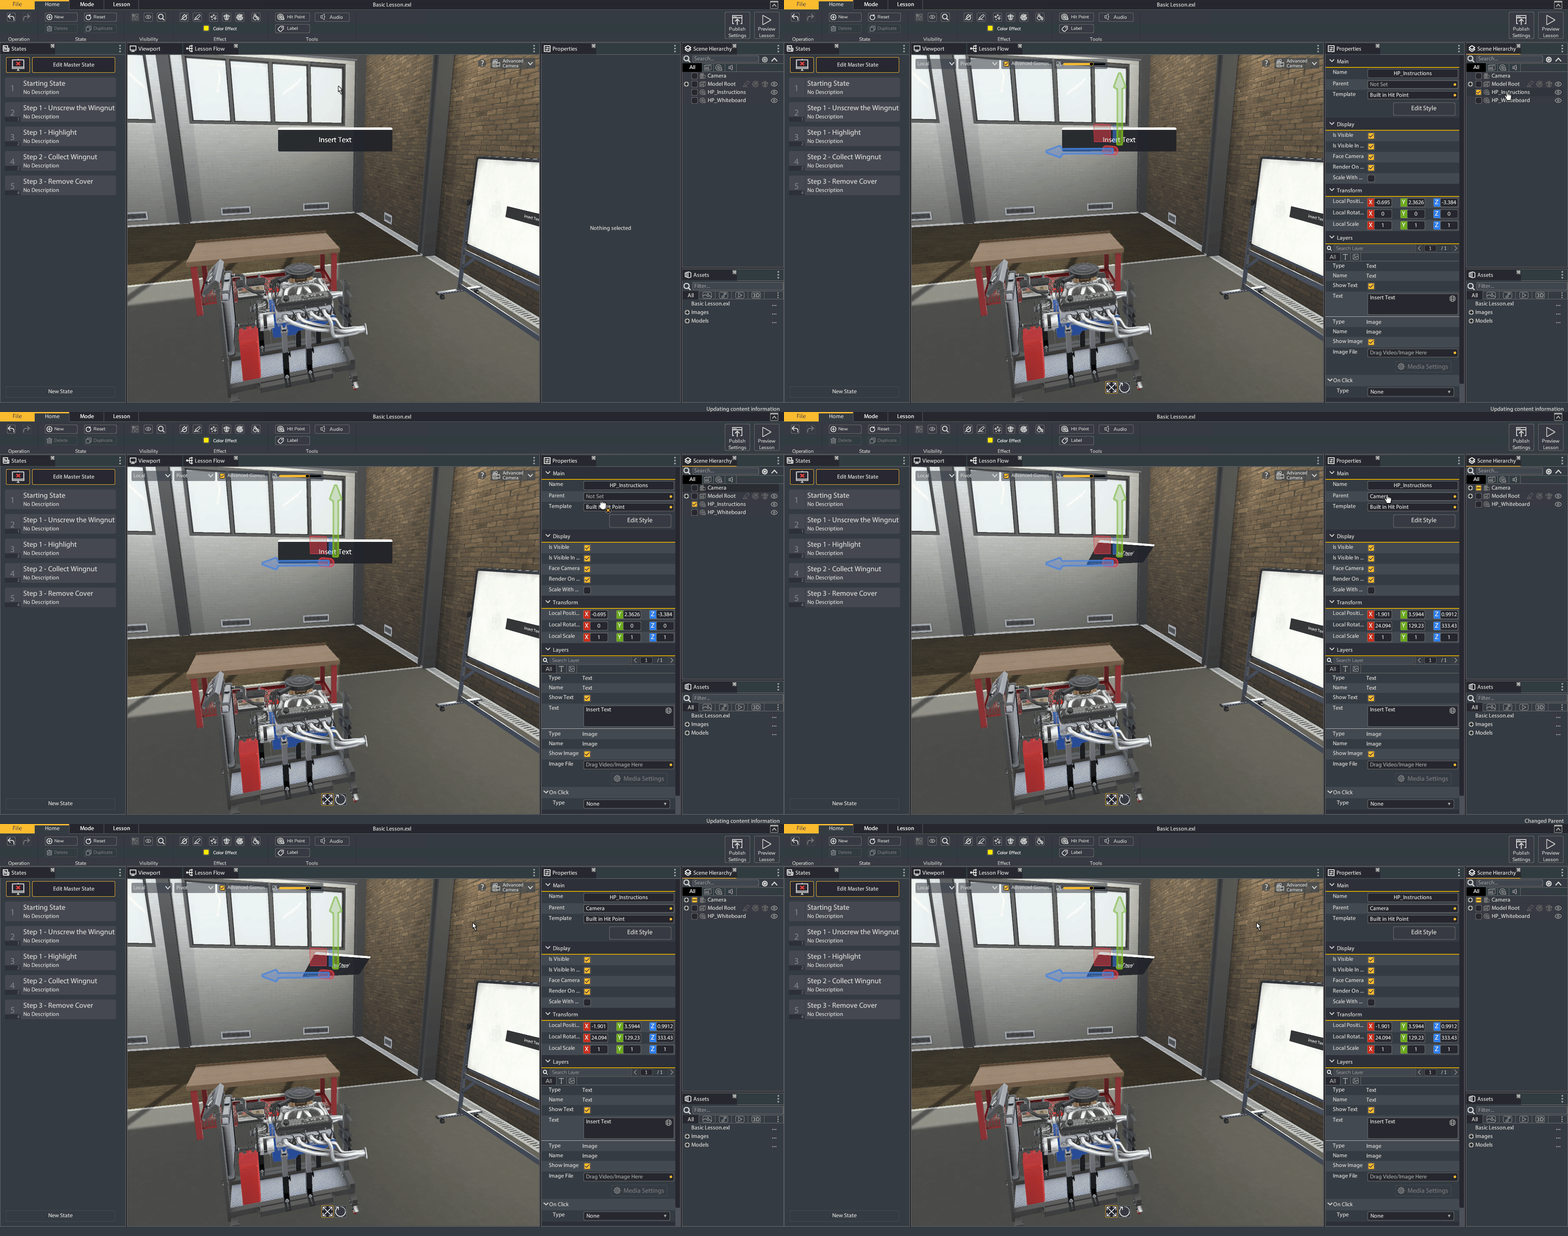
- Parent 'HP_Instructions' to the Camera.
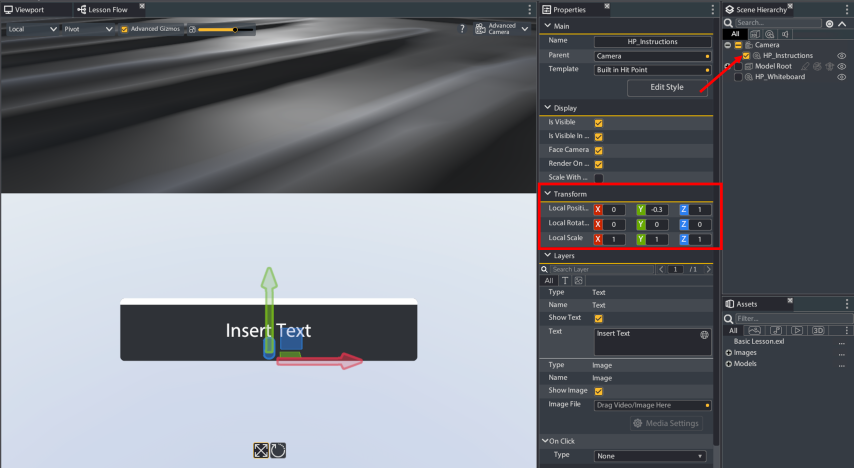
- Adjust the position of 'HP_Instructions' to have the following Transform settings:
- Local Position: X:0 Y:-0.3 Z:1
- Local Rotation: X:0 Y:0 Z:0
- Local Scale: X:0 Y:0 Z:0
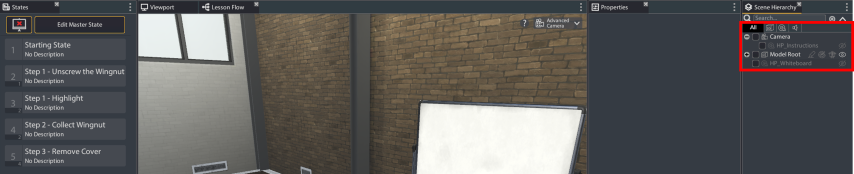
- Disable the Visibility of both Hit Points.
- Exit the Edit Master State mode and select 'Starting State'. Make 'HP_Whiteboard' visible.
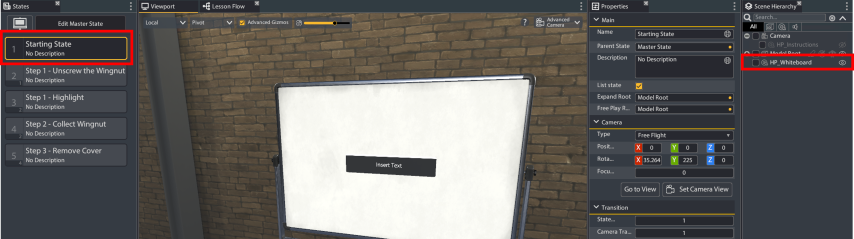
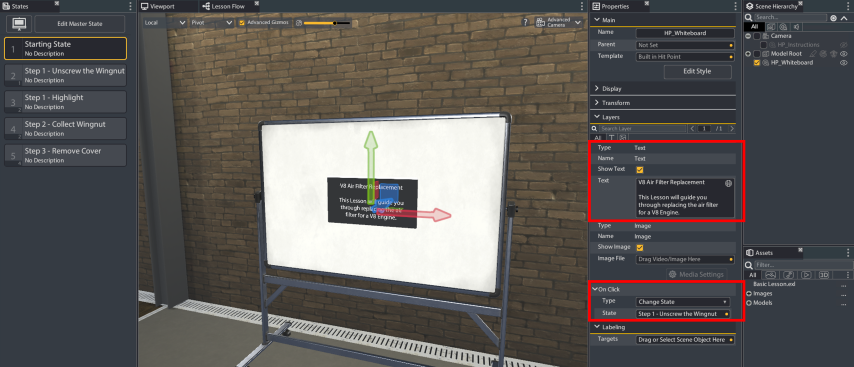
- Edit 'HP_Whiteboard' to display text providing an introduction to the user and change the On Click Action to change to 'Step 1 - Unscrew the Wingnut'.
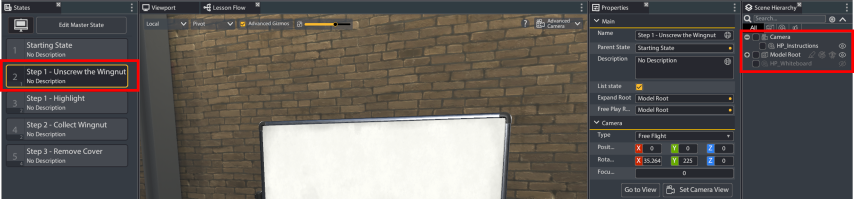
- Select 'Step 1 - Unscrew the Wingnut'. Toggle the Visibility of 'HP_Whiteboard' off and set 'HP_Instructions' to on.
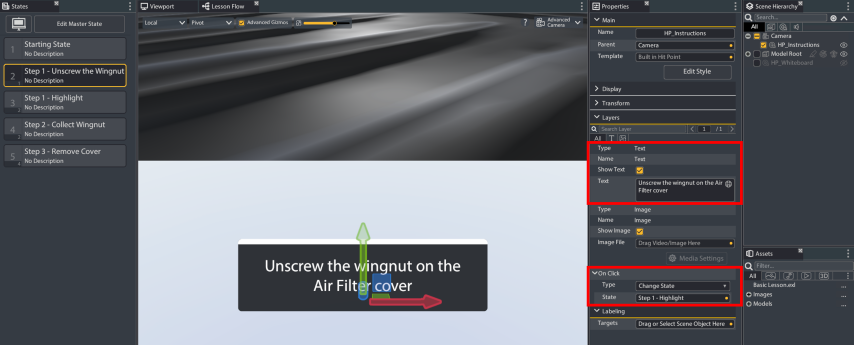
- Edit 'HP_Instructions' to display text providing instructions to the user and change the On Click Action to change to 'Step 1 - Highlight'.
Hit Point Style Editor
While the Hit Points we've created are functional, they can be polished even further via the Hit Point Editor. However, as this is not strictly necessary for the lesson being created, the 3-6-2 Hit Point Editor section is optional. That said, the sections afterwards will incorporate these changes into the videos and screenshots.