User Tracking
In Xplorer you can track the users lesson progress and interactions by setting up custom or automatic xAPI statements and their corresponding triggers, during lesson creation.
What is an xAPI Statement?
xAPI is an eLearning specification that allows you to collect data about a users learning experience that can be later be interpreted into useful insights. The data is collected though statements in the format Actor, Verb, Object.
Actor: The Actor is usually used to identify the User. For Xplorer this will always be implied by the students Username.
Verb: The verb is used to describe how the user is interacting, it takes the form of a past tense verb such as started, removed, clicked..etc.
Object: The object is used to describe what object/activity the user is acting on. This will also have an optional description that can be used to give more context about the activity taking place.
Example Statement: JSmith removed air filter cleaner.

In this example the Actor = JSmith, Verb = removed, Object = air filter cleaner
In addition there is also the option to attach a result object to an xAPI statement. The properties of a Result are:
Scaled Score: This is the final user score in percentage, a decimal value between 0 and 1.
Raw Score: This is the un scaled score. Integer value between max and min.
Min Score: Minimum possible score expressed as an integer.
Max Score: Maximum possible score expressed as an integer.
Success: Is a true or false value that indicates if the training was successful or not, this indicates a pass/fail result.
Completion: Is a true or false value that indicates completion of the training but not necessarily a pass/fail.
More detail about xAPI statements and their structure can be found here
What is a Statement Trigger?
In order for a statement to be sent to a learning record store (LRS) or Learning Management System (LMS) it will need to be attached to a trigger. A trigger is a condition that defines when a statement should be sent. It is an action statement. In Xplorer we have three types of action statements:
On Enter: A statement will be sent when a user enters the specified Lesson State.
On Exit: A statement will be sent when a user exits the specified Lesson State.
On Click: A statement will be sent when a user clicks on the specified Lesson object or hit point.
What is an LRS and LMS?
A LRS is a Learning Record Store. It is a data store system that serves as a repository for learning records collected from systems where learning activities are conducted such as a lesson in Xplorer Player. It is an essential component of xAPI standard. When a statement is sent off from the Xplorer Player to the LRS it is stored in a JSON format as shown below:
{
  "actor": {
    "name": "John Smith",
    "mbox": "mailto:JSmith@modesttree.com"
  },
  "verb": {
    "id": "http://activitystrea.ms/schema/1.0/remove",
    "display": { "en-US": "Removed" }
  },
  "object": {
    "id": "https://modesttree.com/activity/xplorer/lesson/B6XFha1hcEiU_Igm2gyqNw/AirCleanerFilter",
    "definition": {
      "name": { "en-US": "Air Cleaner Filter" }
    }
  }
}
The LRS is where the statement data is stored but the Learning Management System (LMS) is where the courses are delivered and the training data is interpreted and displayed. The Modest Tree Dashboard can display and report activity data through Monitored training Sessions.
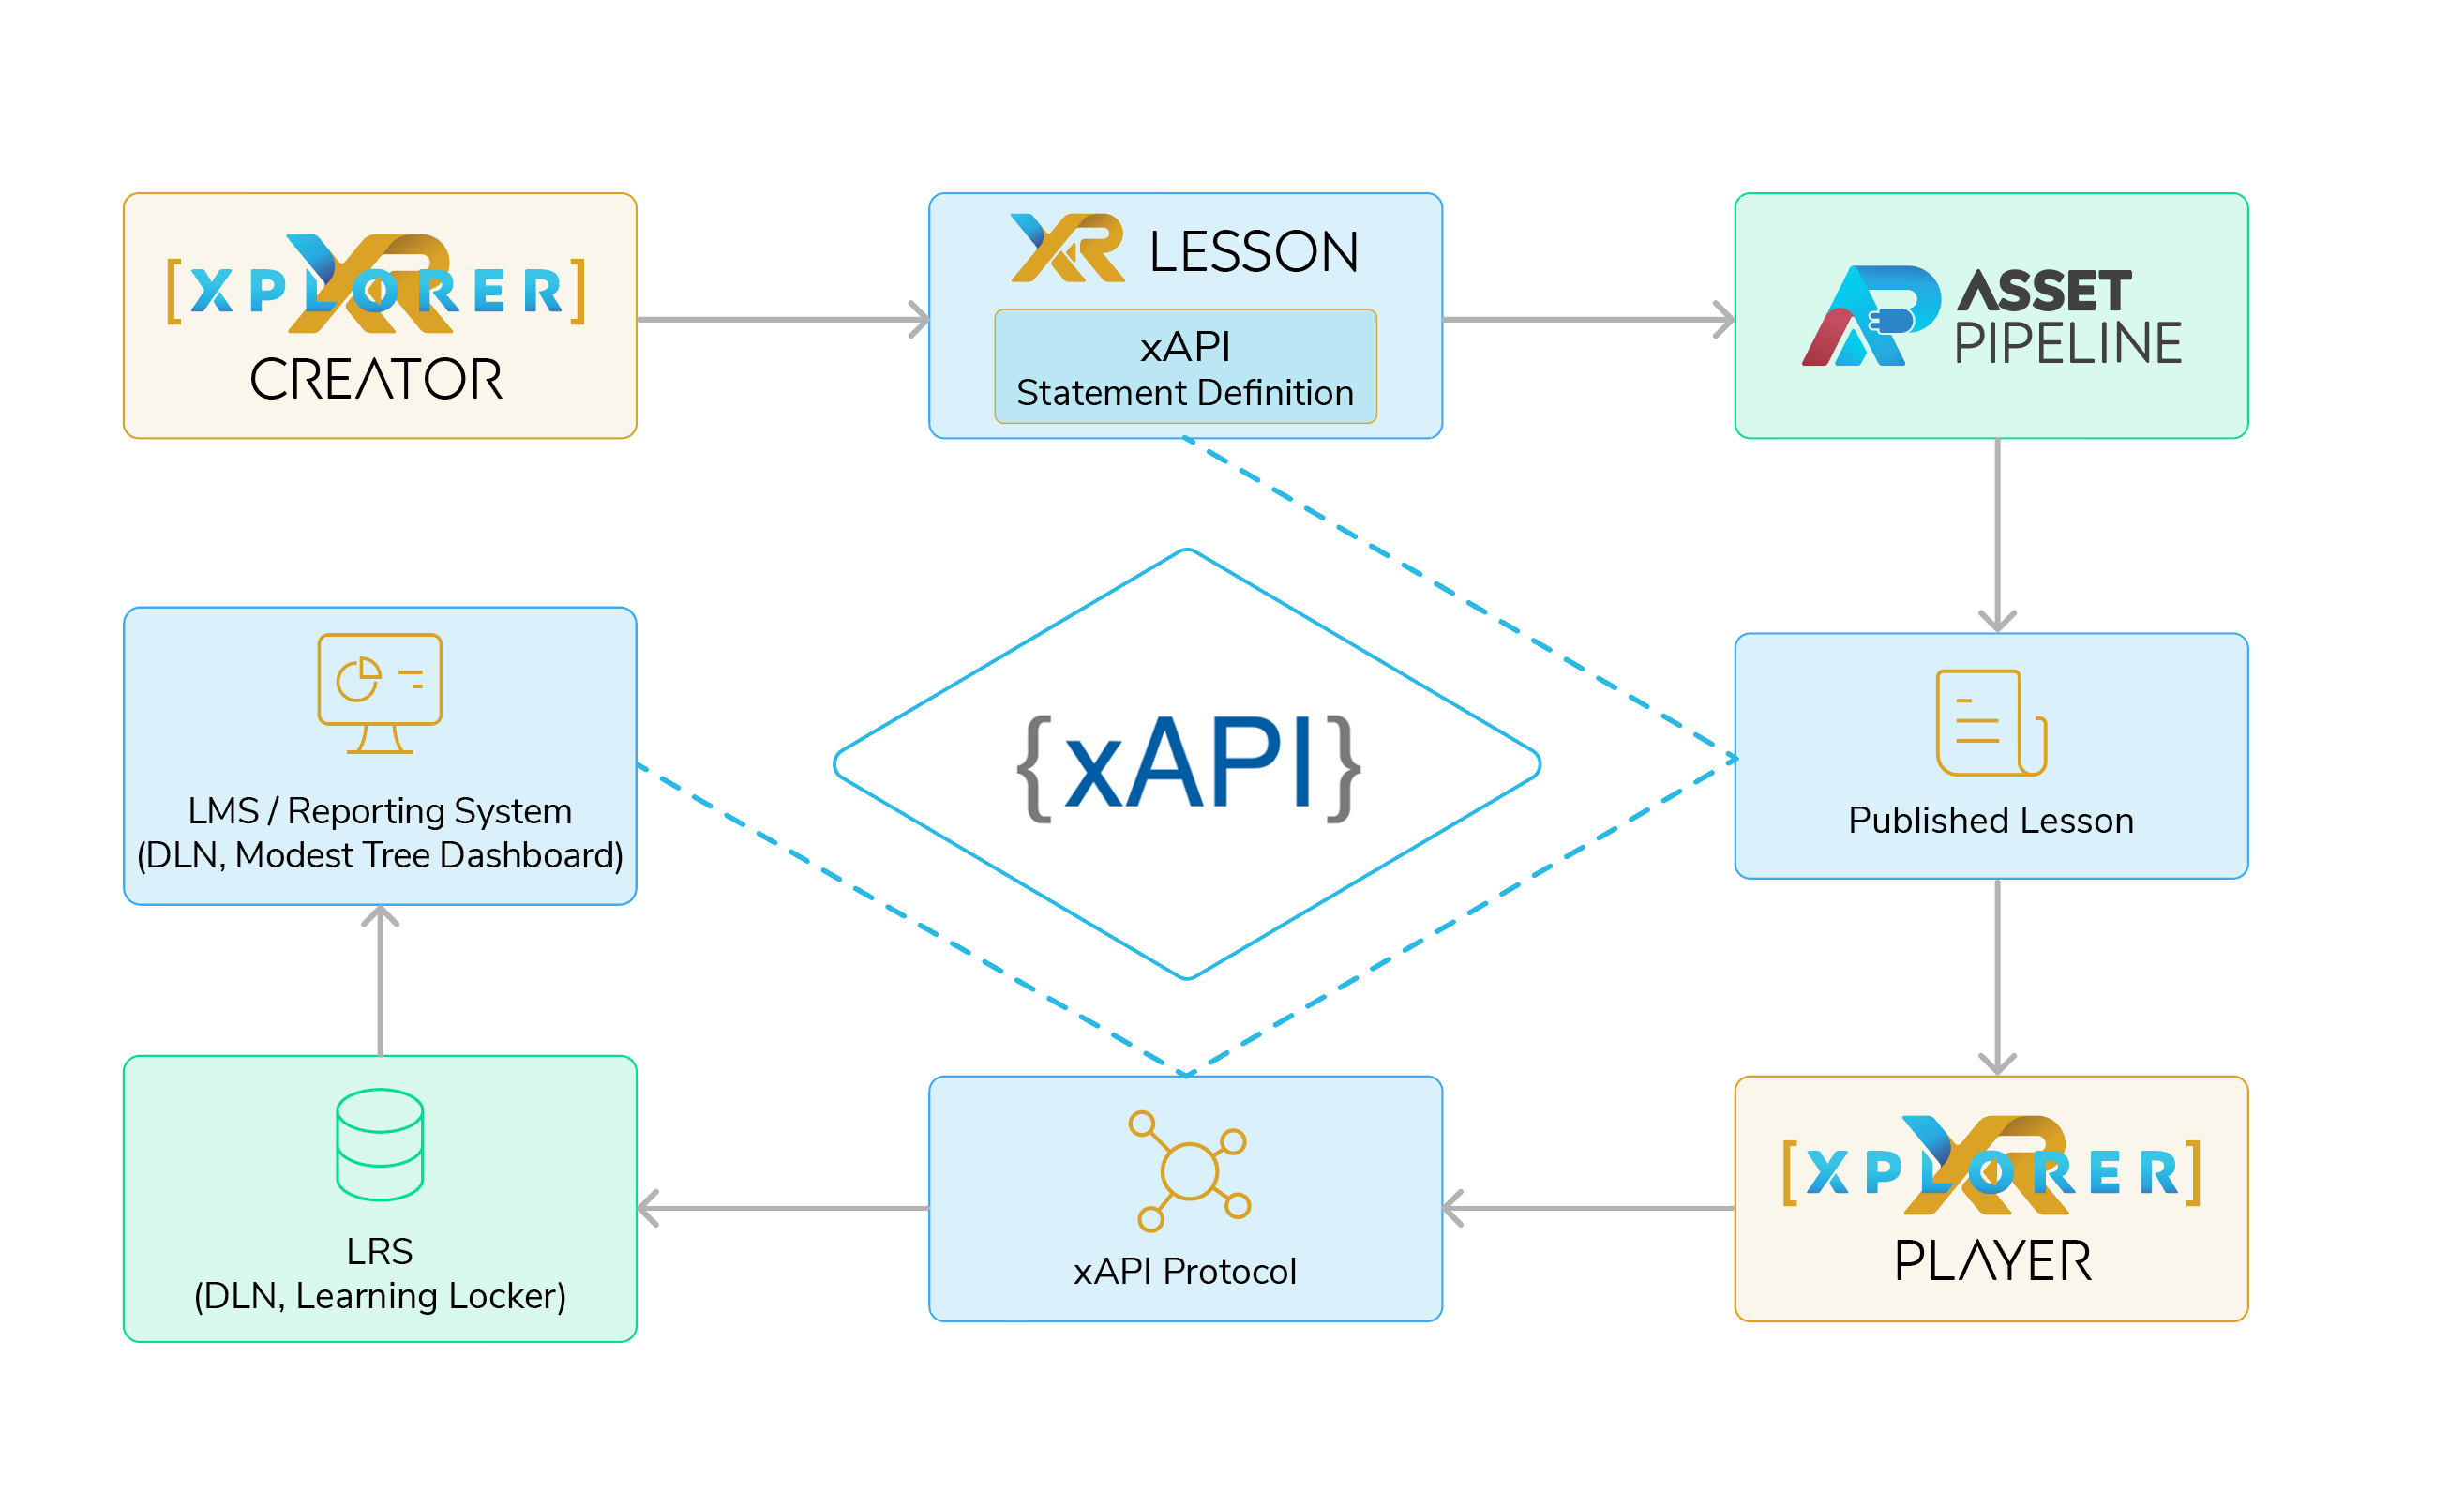
How does xAPI work within Modest Tree Xplorer?
First the lesson creators set the rules for statement generation and their triggers within the Xplorer Lesson. Once the lesson is uploaded to the server, Modest Tree Asset Pipeline processes the source lesson into a published lesson. The student accesses the published lesson through the Xplorer player either directly or linked through a LMS. When a student triggers a statement the xAPI protocol is activated sending the statement data to the LRS. The learning records can then be accessed through an LMS or Modest Tree dashboard to generate reports about the learning experience.
How Do I Add User Tracking in Xplorer Lessons?
The most efficient time to add xAPI statements for user tracking is at the end of the lesson creation process when all the states and interactions have been finalized. When your lesson is complete, Statements can be added by clicking the Statements button from the Lesson ribbon.

Setup Automatic Tracking
Available in Version 2.2.2+
For automatic tracking you simply need to enable tracking for each state you want to generate statements on, for each type of action. You can enable automatic statement generation for four different actions:
- Entering a state
- Exiting a state
- Interacting with a hit point
- Interacting with an object.
- Select the action type you want automatically tracked.
- Customize the verb. By default they are set to Entered, Exited, Interacted but they can be set to any other verb in the dropdown.
- Select all the states you want to track the action on.
NOTE: The Object/Activity will be implied by the context of the trigger. For Example, if you turn "On Enter" tracking on for State1 and JSmith enters State1 the statement will be. "JSmith Entered State1". Where State1 is the state name.
Setup Custom Tracking
Available in Version 2.1.7+
If you need to set a result or apply any other customization to your statements you will need to enable custom tracking. You can enable custom tracking by switching to the "Custom" tab on the statement dialog and adding a statement. You can have both automatic and custom statements active in the same lesson.
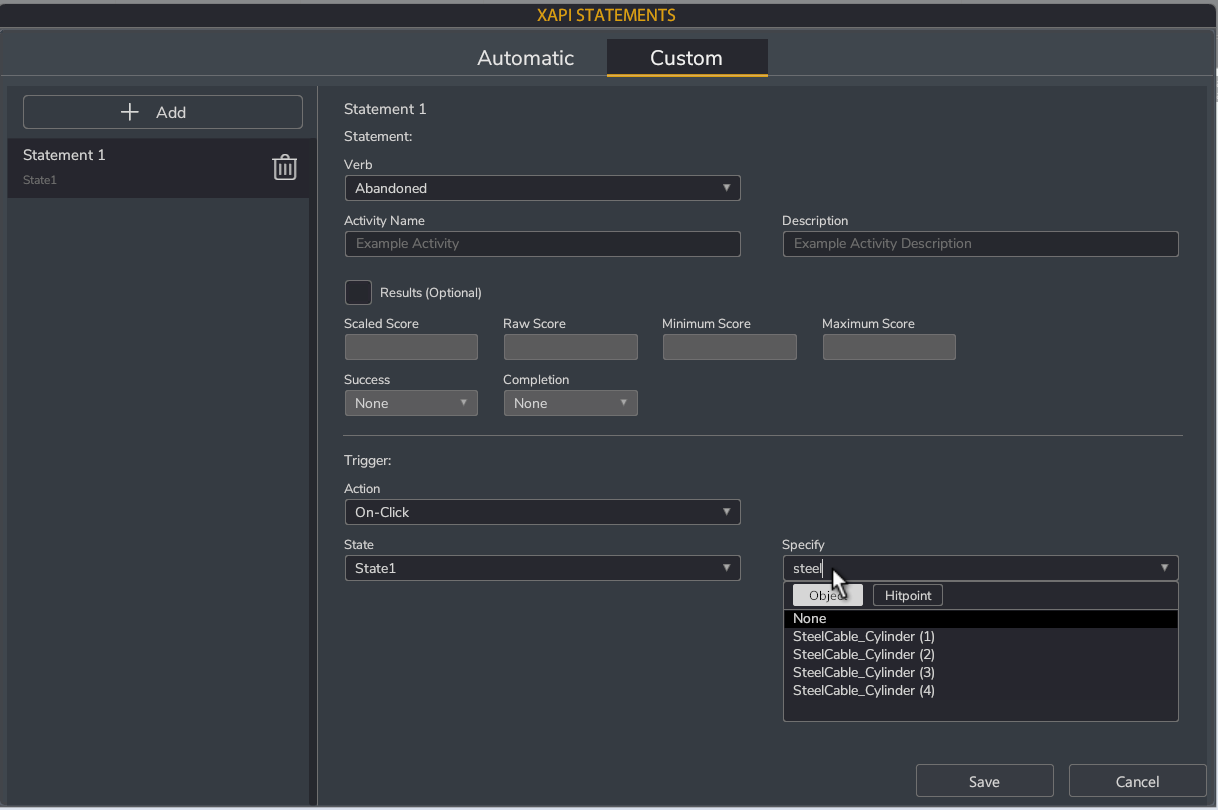
- Add a new statement with the "+ new" Button.
- Choose a verb from the dropdown.
- Fill in the activity/object and optional description.
- Add a result if applicable.
- Set the statement trigger condition by selecting an action type and the state it applies to.
NOTE: if you are using an On-Click trigger you will need to specify an object or a hit point.